

Hi Kids and adults alike welcome.
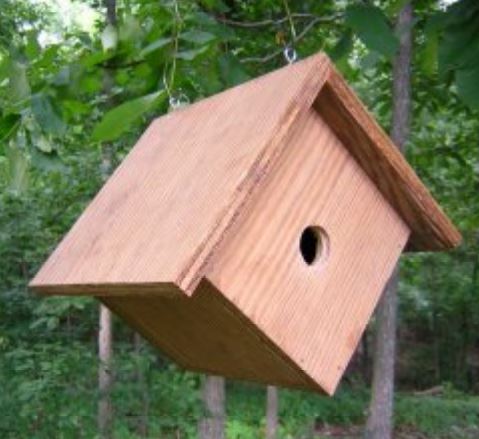
This project is to build a Warden Birdhouse. You will enjoy watching the birds grow up and leave the nest.
Do not ever use power tools, hammers or other dangerous items without an adults or your Mom / Dad helping and supervision.
We at Seagrave United Church believe in sharing all you do with a adult so you both can learn and have fun together so get your grandparents to help also.
Bird House Facts;
There's a lot to consider when building a birdhouse the size of the bird house has to match the size of bird and the nest to be inside. These are basic birdhouse its hole size and position of the hole will depend upon what size of bird you would like have nesting in it. For example you will need a deeper birdhouse from the opening to the floor bottom for a Robin then a chickadee. This is the stop predators from reaching the babies and not to deep that so the mother would be able to bend over and reach the babies for feeding. Most birds do not like to have a perch, it allows predators to stand on it and look in the nest. The following layout is for a Blue Jay bird but if you wanted to use it for a different type of bird all you have to do is change your hole size and location according to where the floor is. Here's how, a Blue Jay stands to his back about 2 inches high so make the floor 4 inches to 5 inches below the opening, a chickadee stands about 1 inch high so make the floor 2 inches below the opening. Different types of birds like their nest a certain distance from the ground too! Always leave a way to open the birdhouse to clean it out ever winter when the birds have left. I use screws on the top so I can open it for easy cleaning.
MATERIALS:
1. One 2 by 2 foot 1/2 inch plywood, 2. Four 1 inch galvanized deck screws,
3. about twenty 1-1/2 inch galvanized finishing nails.
4. 2 Galvanized eye hooks and
wire for hanging, 5 Power drill (drill bits), 6.
Appropriate-size spade bit, 7. Hand saw, 8. Sandpaper, 9. Paint (optional)
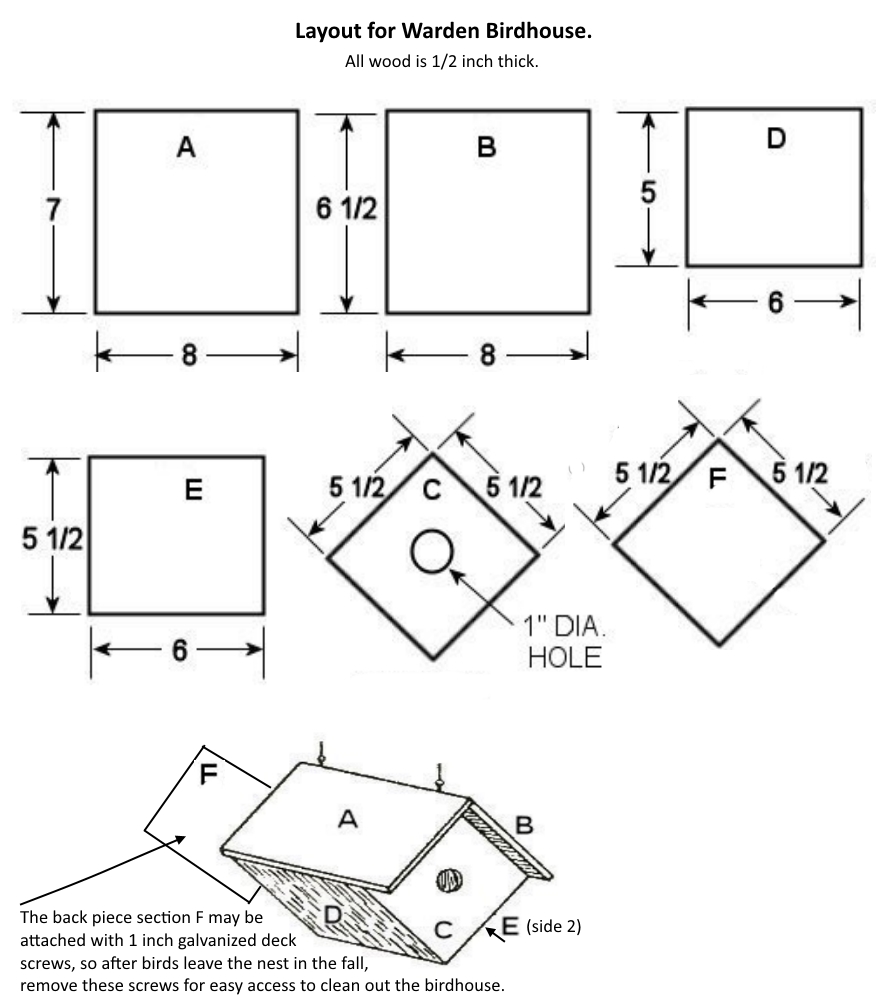
STEP 1 Cut the
wood as shown in the layout diagram.
STEP 2 Attach the front C to the sides D then
E with
1-1/2 inch nails. Pre-drill the holes in the front piece to prevent the
wood from splitting.
STEP 3 Attach the back F to the sides with
galvanized deck screws. Pre-drill the holes, prevents the wood from splitting.
After birds leave the nest in the fall,
remove these screws for easy access to clean out the birdhouse.
STEP 4 Attach the roof B first lining up to
the back of F and Top of C then nail on. Do not nail the side to the back or you won't be able to open it
for cleaning.
STEP 5 Attach the roof A, first lining up to
the back of F and Top of B then nail on. Do not nail the side to the back or you won't be able to open it
for cleaning.
STEP 6 Attach the 2 eye hocks on the top as shown in picture above for hanging.
When you are finished making you bird house you can colour it with flowers (not front panel). After all colours have dried, paint it with a clear water repellent paint. Important, follow safety instruction on paint cans and have fun.

GO BACK TO

©Copyright by Seagrave United Church, Ontario, Canada